
10 Pro Tips for Using Driveway Markers
RAISE THE STAKES
Our parent company, Outdoor Concepts, has been plowing snow for over three decades. In that time, they’ve gone from using a single truck to operating an entire fleet and learned a thing or two about good snow plowing practices.
Snow plowing is about more than speed and moving on to the next job as quickly as possible. It’s also important to finish a job without harming the property or your equipment. One product that can help you operate quickly and safely is driveway markers, also called snow stakes.
Back in the day you might have used wooden stakes to mark a driveway. However, pounding them into the ground was back-breaking work that required a sledgehammer. The entire process was made more frustrating if the stakes broke during installation or had to be replaced later on when the ground was frozen. Plus, wooden stakes could be more difficult to see, especially in the early morning or late evening.
Thankfully, the introduction of fiberglass driveway markers in recent years has revolutionized the plowing process. Fiberglass stakes are lighter, more visible, and far easier to install. However, getting the most use out of them requires some forethought and care. Here are our top ten tips for using driveway markers for your snow plowing. Buckle in and get ready to take your snowplowing to the next level.
1. Use the right kind of marker
The old-school wooden markers have their advantages. They usually cost about 10-20 cents each, making them the more affordable option (at least at purchase time).
However, they tend to split during installation, and they aren’t as sturdy as their fiberglass cousins. Plus, if you’re concerned about visibility, you’ll probably want to paint your wooden stakes or apply reflective tape to them.
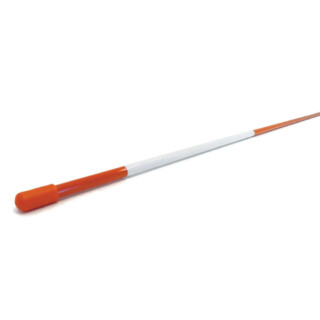
While fiberglass stakes are more expensive, they tend to last longer and perform more dependably in harsh environments. That said, installing these can still be a pain, especially if the ground is already frozen or if your soil is rocky. If you use a drill to create pilot holes for your stakes, prepare to burn through several bits. However, we recommend checking out tip #8 for an alternative installation method.
You should never use other materials (like rebar or PVC pipe) as snow stakes. Any material other than wood or fiberglass can result in harm to people or objects.

2. Consider if you need reflective stakes
Snow stakes with reflective tape are much more noticeable, providing a clear boundary even in minimal light. Even though they’re more expensive, the increased visibility can justify the cost, especially when used for irregularly shaped plots and curved drives.
Non-reflective markers are best suited to straightaways or areas where visibility isn’t as vital.
There may be situations where you’ll want to use both types. For example, in areas that tend to accumulate deep snow, you could drive a non-reflective marker into the ground and attach a reflective one to the top. This way you are increasing your stake height but saving some cash by using a less expensive marker for the base.
You could also alternate stake types—a reflective marker first followed by a non-reflective and so on. You’ll cut down on costs while still helping to protect equipment and property from damages due to bad visibility.


3. Give yourself time to survey the property
You want to use your driveway markers in a way that will maximize visibility and safety, which means you’ll need to put some thought into the places they’re most needed.
If you’re using driveway markers as a snow removal professional, you’ll generally want to survey current clients around the time of the first frost in your area. If you hit them up too early, they might not be thinking about snowfall yet, but wait too long and you risk them switching to a competitor.
However, for new clients, it’s a good idea to survey the property as soon as you’re able and take thorough notes. Do some preparation beforehand as well—print a list of questions for your customer and use Google Maps (or a similar product) to get and print an aerial view of the property to use during your meeting.
This will let the customer point out areas that need to be cleared first and help you determine where you should pile snow.
Use those factors to figure out where to install your snow stakes. And even if you’re just installing markers on your own property, you can still use those factors to guide you in your placement.
4. Treat residential and commercial properties differently
Commercial properties often need more snow stakes than residential ones. Don’t cut corners to save a buck. Additionally, consider who will be present on the property. Are there children, pets, or elderly or disabled individuals? Be sure to stake high-traffic locations and areas that absolutely must remain clear, such as fire hydrants.
However, make sure you’re paying close attention to what the property owner/management wants. If you want to keep your customers, you want them to be happy with the results of your work. For example, if they require a specific type of stake or marker, listen to them and take that into consideration when quoting their snow removal rates.
5. Don’t wait too long to put your markers in
There’s some disagreement over the ideal time to put your snow stakes in the ground. Furthermore, timing varies by region since in some places, the ground might freeze prior to the first snowfall.
However, if you live in North America, doing your staking in October is a good rule of thumb. By this time, most customers are already thinking ahead and are ready to prepare for winter.
You may have reasons to wait to put your stakes in. However, don’t forget to consider stake availability. If you wait to stake, you might not be able to find enough markers. Most suppliers restock at the beginning of a season, and when they run out, they don’t restock until the following year.
Lucky for you, here at The ROP Shop, we always ensure that we have a steady stock of driveway markers—even through the off-season.
6. Space your stakes properly
It’s important to place stakes at the right distance, especially if you’re new to plowing or haven’t plowed a specific property before. Spacing the driveway markers ten to fifteen feet apart is the general rule. It’s always better to be safe than sorry, though, so we recommend using a few extra stakes. You can always remove some stakes later if you discover you went overboard.
7. Allow for snow accumulation
If you ask plow pros where they set their snow stakes, many might tell you they place them 1 to 2 inches away from the road or drive. However, that doesn’t leave much room for snow accumulation, and you ultimately risk dislodging or breaking your driveway markers. Try installing your snow stakes 6 to 12 inches away from the spot you’ll be clearing so sprays of snow and ice don't bury or break them.
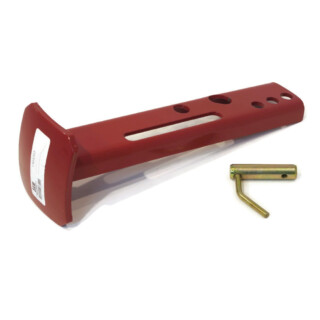
8. Use the right tools

No matter what region you live in, it’s always best to get your markers in before the snow falls. However, doing so can be a troublesome process. You can speed it up by using The ROP Shop’s driveway marker/snow stake installation tool. Check out our blog
or watch this short video
to learn more.
9. Adapt for curved drives
When placing markers along a drive that forms a line, the process is pretty straightforward. You won’t need many stakes to mark the entrance, and it should be simple to mark spots to place snow heaps.
On the other hand, if you’re working with a curved driveway, you’ll want to mark much more frequently and pay extra attention to crucial spots at the bends. Use your best judgment and err on the side of installing extra stakes to decrease the risk of hurting your plow or the property. Investing in more markers will cost less than it would to repair curbs, landscaping, or your equipment.


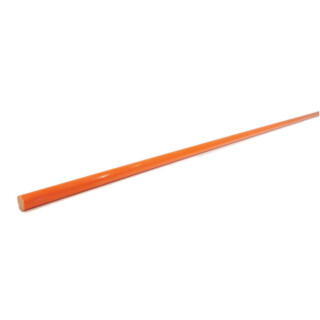

10. Color-code your driveway markers
Using different colors with your markers can help you identify specific obstacles or landmarks even after the snow falls, helping to cut down on your plow time.
For example, use reflective orange stakes at entrances and non-reflective ones on straightaways, or blue markers could be placed near fire hydrants, crosswalks, and other spots that need to be totally clear.
TIME TO GET MARKING
Now that you know how to get the most out of your driveway markers, you’re ready to put your knowledge into practice.
The ROP Shop stocks driveway markers for snow plows in a mixture of colors, sizes, and reflectivity to help you meet your snow safety needs. Plus, if you’re a business owner and would like to order custom stake lengths, colors, or widths in quantities of 3,000 or more, we would be glad to accommodate you. Contact us today!
Also, be sure to check out our other snow removal blogs to keep your winter season hot!
[EDITED 3/2023]

Having trouble using your ROP Shop pressure washer surface cleaner? These tips can help you out.

Thinking about getting a pressure washer? Here are eight advantages to owning a pressure washer to help convince you.

Installing a new pressure washer pump doesn’t have to be a hassle. Let The ROP Shop walk you through it.

Ready to learn how to pressure wash quickly, effectively, and safely? Check out these eleven tips.