
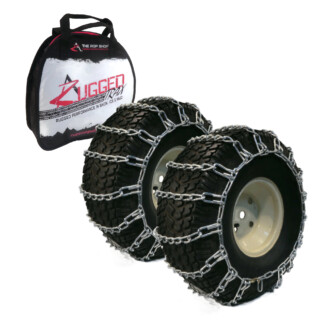
How to Install Snow & Mud Tire Chains and Tensioners
Fed up with slipping and sliding? Tire chains could be exactly what you need. But once they're in your hands, how do you install them?
Installing tire chains incorrectly can cause damage to your equipment, so you don't want to guess. Fortunately, we've created this guide to walk you through the installation process, step by step.
Pre-installation notes
A few quick notes before we head into the installation:
- Before ordering your chains, double-check the size of your tire. You'll need the outer diameter, the width, and the rim diameter. These measurements should be cast into the tire's outer wall, but if not, be precise when measuring. If you're even half an inch off for a single dimension, it can negatively impact the fit of the chains.
- Once you know your tire size, check our inventory and select the chains that match your tire dimensions. Some of our tire chains are compatible with multiple tire sizes. However, as you're browsing our website to order your chains, make sure the exact size of your tire appears on the listing. If you're not sure which chains you need, feel free to give us a call, send us an email, or chat with us through our website. We're here to help.
- You can use spring tensioners to increase the pull on your chains and decrease the risk of your chains coming loose. Some of our tire chains already come with spring tensioners. If this is the case, you will see it on the listing. However, you can also purchase tensioners separately from us.
- Keep in mind that our tire chains are ladder-style and are only compatible with tires that have turf-style treads. If you've got lug, ag, bar, or industrial treads, you'll need diamond-style chains to prevent them from falling between your treads.
Stage 1: setup for tire chain installation
1.1 Set up your lawnmower, snowblower, or ATV in a place where you can easily roll the unit forward or reverse over the chains without hitting obstacles. Be mindful of the surface you put the chains on, as they can cause damage to some surfaces. It is quicker and easier to install two adjacent tires simultaneously, but it can also be done one at a time.
1.2 Engage your brake and/or hydrostat on your equipment until you're ready to move.
1.3 Remove chains from the bag and lay flat on the ground with the cross-chain hook ends facing the floor and the adjustable hook on the outward side of your equipment’s tires. Begin by simply laying out your tire chains identically with the chain fasteners on the outside end. Then, for the pair of chains that currently has the adjustable hook on the inside, take them and rotate them around. This puts the adjustable hook link on the outside of the tire for your installation while keeping the cross-chain hooks in the proper orientation.
1.4 Untangle the chains, ensuring there are not any twists. Check each section between the cross-chains. Take your time during this step.
1.5 Check your setup. Make sure the hooks won't end up under the treads when you roll your machine over them.
Stage 2: putting on your tire chains
2.1 Disengage your brake and/or hydrostat and put your unit into neutral. Then roll (don't drive) your machine until the tire is centered and about 3/4 of the way to the end of the chain. We recommend rolling instead of driving to prevent accidents and damage to equipment. If you must drive over the chains, take it slow and easy.
2.2 After rolling your machine into place over the chains, release about 10 PSI of air pressure from the tire. This will make the installation easier and helps to ensure a snug fit.
2.3 Take the corners of the chains under your unit. While keeping the chains from twisting, pull them up and over the tire until they drape over the other side. Ensure that the chains are centered on the tire so that the ends of the cross-chains hit at the same spot on the inward and outward-facing sides of the tire.


2.4 Tuck the first cross-chain (the one on the end without the fastener and hook) underneath the tire.
2.5 Pull the inner chain tight and fasten the hook.
2.6 Secure the outside by pulling the chain tight and threading the fastener all of the way through one of the rim links on the opposite end. You will then rotate the fastener back 180 degrees and secure it to a rim link on the same end that the fastener came from.
Stage 3: adjusting your tire chains
3.1 Check the tightness of the rim chains. They should be as tight as you can make them without the use of tools. If they seem loose, unhook the fastener and repeat steps 2.5 and 2.6.
3.2 Reinflate your tires back to factory specifications to provide a snug fit.
3.3 Drive forward slowly with the chains on your tires for 30-40 feet and recheck for tightness.
3.4 Once you are satisfied with the fit, you can either cut excess rim chain links or (our recommendation) tie the links back using heavy-duty twist ties.
3.5 If you purchased our spring tensioners, attach them now. Simply connect the hooks to four opposing links on the rim chain to form a + shape over the tire.
Post-installation notes
You're just about finished. Now for a few extra tips to help you get the most out of your tire chains:
- Going forward, periodically check chains for tightness and adjust as necessary.
- If you do need to tighten a chain, we recommend beginning by loosening the outside latch but keeping it connected to the link you initially threaded it through. Then adjust the inside hook as needed before returning to the outside and re-securing the latch.
- If any cross-chains break, you will need to remove, repair, or replace the broken chain. DO NOT continue to use tire chains if a cross-chain is broken.
- Maintain proper air pressure in your equipment’s tires.


Need extra help installing your tire chains?
Check out our video. It will give you a visual guide for these steps so you can clear up any confusion you might have and make sure you did each step properly.
Wrapping up
There you have it: a step-by-step guide to installing your new tire chains. We hope these instructions have been helpful and that you get a lot of use out of your new chains.
Don't forget that you can contact our customer service team if you need extra help with your installation or have questions about your chains.
[UPDATED 10/2023]

Having trouble using your ROP Shop pressure washer surface cleaner? These tips can help you out.

Thinking about getting a pressure washer? Here are eight advantages to owning a pressure washer to help convince you.

Installing a new pressure washer pump doesn’t have to be a hassle. Let The ROP Shop walk you through it.

Ready to learn how to pressure wash quickly, effectively, and safely? Check out these eleven tips.