14 Snowblower Tips to Boost Your Snow Removal Efforts
When you think about it, your snowblower or snow thrower has a pretty cushy life. Even if you've picked the perfect snowblower, it only gets pulled out and used for a few months of the year. But when its “vacation” is over, you want to get your money’s worth. You’ve got to make it count by using the best snowblowing techniques, right?
We’re here to help with this list of tips to help you use your snowblower properly. Follow along and get ready to supercharge your snow removal this winter.
1. Help your snowblower send snow farther

It does you little good if, when you begin to clear your drive of snow, you only throw the snow into the next area where you will be making a path. This is fruitless and can bog down your blower.
Instead, help the snow to blow more freely: reduce the friction in your chute by spraying it down with nonstick spray. Yes, nonstick spray. Do the same for your augers.
Spraying those parts will also make it less likely that snow will jam your system. There are commercial chemicals you can spray onto your blower, but this works in a pinch.
There are a few other measures you can take to increase your blower’s distance. First, you can take smaller passes, which means less snow in the chute. Second, you can adjust the chute to a pitch that allows for a greater blowing distance. Third, slow your pace while keeping the RPMs high. Finally, the easiest thing to do is to blow with the wind, letting nature do the work for you.
These steps will also help to prevent clogs.
2. Use a single-stage snowblower for light work
Before you go to buy a snowblower, consider what kinds of conditions and types of snow you will be throwing. If you'll be doing smaller and lighter jobs, you will want a single-stage gas or electric snowblower.
Though these units tend to be more compact and less expensive, they are not built to handle large amounts of snow or wet, heavy, compacted snow. They typically use rubber or plastic augers that can quickly become clogged or break under conditions outside their intended use.
The term "single-stage" refers to the fact that the unit simply uses its augers to throw the snow out of its chute (which is why they're often called "snow throwers").
If your snowfall is typically under 8” (for gas) or 4” (for electric), then these units will work great for short, flat surfaces.
Also keep in mind that these units (if they're gas) are usually two-cycle engines and require mixed fuel (part oil, part gas). This means you'll need a second gas can, assuming your mower uses regular gas. Two-cycle engines also tend to have a harder time starting in the winter than their four-cycle counterparts, which are what you normally see in the next stage of snowblowers.
3. Use a two-stage snowblower for medium to heavy duty snows
The next level is a two-stage snowblower.
These units get the name "blower" because after the augers pick up the snow/ice, its second stage impeller then discharges it quickly out the chute, helping to prevent any slowdown or clogging. Instead of a manually adjusted chute, these units typically have a crank-adjusted chute for adjusting positions with a larger diameter to move the snow out.
These snowblowers are normally larger and have metal augers. They also have large tires and a higher ground clearance, making them better for uneven surfaces. With the adjustment of the shoe on either side of the blower, they can be set up to work on concrete and gravel as well.


4. Use a three-stage snowblower for heavy snowfalls
Think "go big or go home." Three-stage snowblowers are the workhorse of the snowblower residential world and tend to add a few luxuries while they are at it.
After the first set of augers scoops up the snow and ice, a second auger pulverizes it before sending it to the impeller for discharge. This added feature, along with other features available in some units like heated handles, simpler chute controls, and self-propulsion, makes them the go-to snowblowers for the most rugged conditions.
5. Be smart about storage
At the end of the season, how you treat your snowblower directly affects its performance and longevity.
For example, parking your unit inside instead of outside makes a big difference. Additionally, for a longer lifespan, be sure to drain your gas if the unit will be sitting for more than a month. Bad gas can cause corrosion and clog your fuel lines and carburetor.
There are other great tips for end-of-season storage of your snowblower that you can find in our other blog, “Snowblower End-Of-Season Checklist.”
6. Be safe with your snowblower
Using a snowblower correctly is key to staying safe when using this powerful equipment.
Improper operation leads to clogging, and injuries can occur if a clog is cleared incorrectly. In fact, the US Consumer Product Safety Commission reported that ERs treated over 4,200 snowblower-related injuries in 2021, over 40 percent of which occurred on the hand, wrist, and fingers.
This means that you should NEVER clear a clog using your hands. Keep this in mind and be sure to operate your machine safely and as it was intended to be operated.
7. Dig in early
It may sound strange to hear that blowing snow multiple times is better than doing it all at once, but it’s true. As tempting as it might be to wait for all the snow to hit the ground, doing so can create an unnecessary workload for you and your equipment.
Hit the powder when it is more manageable. Your arms, back, and legs will thank you for it, and your blower’s parts will last longer. Plus, it will allow you to throw the snow further away early on, keeping your drifts small.
8. Be prepared
When you’re mowing, nothing’s worse than going over a toy, newspaper, or rock. The same goes for snowblowing. Before the snow even hits the ground, prepare the areas you know you’ll be traversing with your snowblower.
If your path will be hard to see with a blanket of snow over it, install driveway marker stakes ahead of time to know where the edges are. This is always best to do before the ground freezes and with one of The ROP Shop’s snow stake installation tools. However, if you bought your stakes from us late in the season, you can always use a cordless drill and masonry drill bit to prep the holes.

9. Use fresh gas each season
If you’ve ever seen a lawnmower or snowblower cough up a billowing cloud of thick smoke when it started, chances are it had bad gas in it.
Failing to drain your tank at the end of each season will not only increase your chances of hard starts, but it also allows your lines and carburetor to become gummed up and eventually fail.
The best course of action is to run your tank dry. However, if this is not possible, many snowblowers are equipped with fuel shutoff valves.


To take advantage of this feature, pour in the recommended amount of stabilizer for the fuel in the tank. Run the tank for about 5 minutes, allowing the mix to move through the carburetor and lines. Then use the shutoff to cut the flow of fuel. Allow the carburetor and engine to run out the rest of the fuel in the line.
When you are ready to start it next season, be sure to mix fresh gas in with the stabilized gas for best results.
10. Let your snowblower cool down
For the sake of safety, if you are unable to complete your snowblowing before depleting your fuel supply, wait at least 10 minutes for your motor to cool before refilling.
Every year there are many cases where people are burned and hospitalized because the hot engine ignited fuel that spilled and caused flames to flare up.
Even if you are lucky and avoid being burned, you could accidentally roast your snowblower, and then you’re back to shoveling.
11. Use the right oil
Regular oil tends to thicken when it gets cold. This can make cold starts even more of a challenge.
You should switch to synthetic then, right? Actually, it depends. If your unit is brand new, going with synthetic from the start is not a bad decision, but if your unit has a lot of hours on it, suddenly switching to a full synthetic may actually cause problems with existing seals.
Your best bet with a veteran snowblower is to go with a synthetic blend. This protects your aged motor while giving you the smoother starts you are hoping for.
12. Do your preseason prep
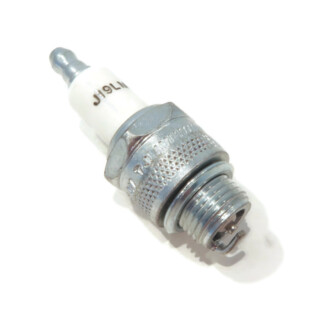
Make sure you are up on your preseason maintenance with new spark plugs, fresh oil, and a good inspection of your snowblower. Be sure to check out our blog for a more comprehensive preseason snowblower maintenance checklist.
13. Plan and buy ahead
Ask yourself, “What are the parts I may need?” and get them well before the season starts.
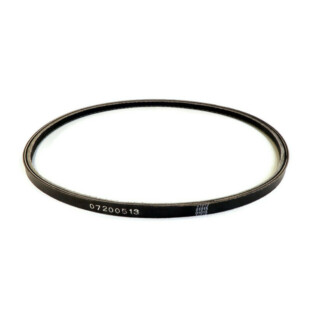
For example, shear pins and belts are very affordable and easy to stock up on. In fact, The ROP Shop stocks many of these items year-round and ships them straight to your door. Plus, if you live in the lower 48 states, shipping is FREE.
Don’t risk a part breaking mid-blizzard and bringing your snow removal to a grinding halt. You will then have to pay more to get them from a local shop (if they are open), or worse yet, you may have to improvise.
Picking up some spare snowblower parts before the snowy season hits will save you from spending a lot of money later.
Plus, don't just think about the minimal parts that will keep your snowblower running. Consider grabbing some extra accessories that will make your snow removal easier, such as driveway markers or tire chains. If you need to know what those are or how to use them, we've got you covered:
- Tips for using driveway markers
- How to install driveway markers
- The basics of tire chains
- Installing tire chains
14. Don't leave out lubrication
Be sure that any part of your unit that requires lubrication gets coated. In the long run, this will help you avoid aggravation and expensive repairs.
The drive shaft can be lubricated by removing the shear pins, adding the lubrication, and then spinning the augers to allow the lube to work its way up and down the shaft.
You can also add lube to the shear pins themselves, making them easier to remove. Some units also provide a grease zerk to make lubricating the drive shaft easier.
Conclusion
After reading these snowblower tips, you're probably itching to launch some snow into the sky. So get out there and apply your new knowledge!
If you need replacement parts for your snowblower, you know where to turn. We're here to help.
[UPDATED 11/2023]

Having trouble using your ROP Shop pressure washer surface cleaner? These tips can help you out.

Thinking about getting a pressure washer? Here are eight advantages to owning a pressure washer to help convince you.

Installing a new pressure washer pump doesn’t have to be a hassle. Let The ROP Shop walk you through it.

Ready to learn how to pressure wash quickly, effectively, and safely? Check out these eleven tips.